Showing posts with label Nature Photography. Show all posts

Saturday, August 15, 2009

Depth of Field

D.O.F. or Depth of Field, What is it? Is it the distance from home plate to the center field fence? Is it the height of the wild grass in an unmowed meadow or field? No, it is none of these.

Depth of Field is a term used in photography to describe the focal distance between the nearest object and the farthest object in focus in the focal plane. Here is a simple example of how D.O.F. works. If you are standing on a street corner and you are looking down the street a sign. You notice that most everything is in focus between you and the sign, but the sign itself seem to be a bit out of focus. However, if you squint you notice that it bring more objects into focus including the sign.
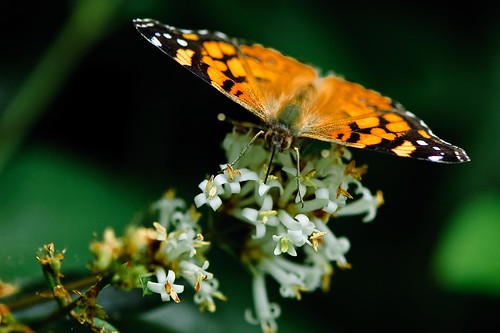

Just a Sip

This happens because as we squint we close down the iris in our eyes. Just like a camera lens we can close down our aperture and create the same affect, increasing the focal distance. If you have a 50mm lens with the aperture adjustments of f2.8 to f22 the larger the number the smaller the aperture opening and the greater focal distance is created. The smaller the number the short the focal distance and the wider the aperture opening is.
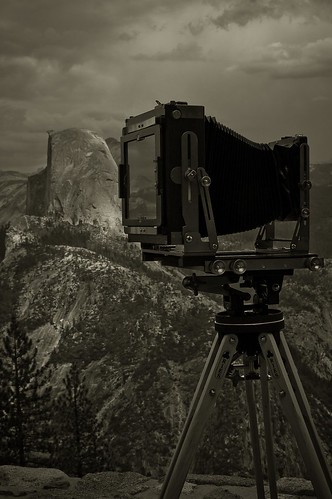
Larger then Large

Keep in mind that the aperture does increase or decrease the amount of light allowed through the lens of the camera. So you will have to adjust the shutter speed to compensate, and make a properly exposed image.

If you have a point-n-shoot camera without all these adjustments, don’t fear. It is possible to achieve the same results even when you are using a point-n-shoot style digital camera. On the top or back of the camera is a dial. On that dial are many different settings represented usually with little pictures.

The mountain picture is used for taking scenic pictures. This is the setting you should use for the greater depth of field. When this setting is selected the camera knows you need the greatest focal range and will select the proper aperture and shutter speed.

For a shallower depth of field choose the picture of the flower. This is for close up photography. This setting will allow you to take a sharp picture of a subject and allow the background to be out of focus.

Give this a try, let me know how it works out for you…

Tuesday, July 28, 2009

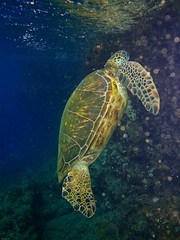
Green Sea Turtle


Green Sea Turtle
Originally uploaded by Kirk Howard

This was taken with my new Canon PowerShot G10 camera and Canon WP-DC28 underwater housing. It took a week to get somewhat familar with all the controls and buttons and knobs.

However by the end of my vacation I was able to capture moments like this free diving with an very buoyant housing. I need to get the weights to help make the camera neutrally buoyant.

Wednesday, May 13, 2009

Yosemite Night and Day


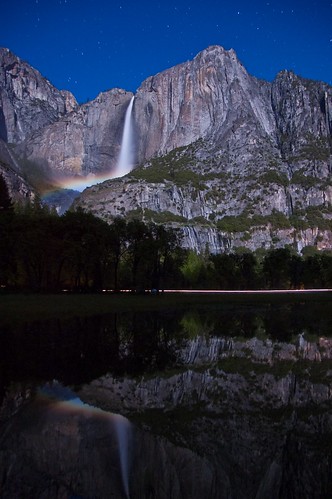
Sunday I drove to Yosemite just for the night. Just like last year in June I went to capture a Lunar Rainbow or Moonbow. This time I went in May on the night after the full moon. The difference from the two months June and May, May has a lot more water coming out of the waterfalls. Here is a link to last years post on Lunar Rainbows or Moonbows June 2008.

Here is a Shot that I took from the pathway in Cooks Meadow parallel to the Merced River. It was almost 2:00 AM and the Moonbow was starting to disappear.


Upper Falls Moonbow

This video was shot on the same day May 11, 2009. It is a 360º view from the highest point on Sentinel Dome.

Sentinel Dome 360º from KiHo on Vimeo.

Sentinel Dome 360º May 11, 2009

Friday, March 6, 2009

Schmap Destination Guide: Photo Inclusion


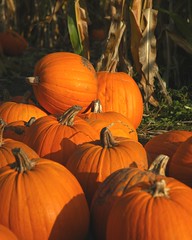
Pumpkin Pile
Originally uploaded by Kirk Howard


One of my photographs has been selected to be included for the Schmap Destination Guide.

I have personally never used this guide before, but I checked them out to make sure it was on the up and up. It seems to be directed to the mobile phone market specifically the iPhone.

I have included the letters that were sent to me via Flickr mail.

************************************************************************

From: Emma J. Williams
Subject: Schmap: San Francisco Photo Short-list


Hi Kirk,

I am writing to let you know that one of your photos has been short-listed for inclusion in the sixth edition of our Schmap San Francisco Guide, to be published mid-March 2009.

www.schmap.com/shortlist/p=66304943N00/c=SJ20012965

Clicking this link will take you to a page where you can:
i) See which of your photos has been short-listed.
ii) Submit or withdraw your photo from our final selection phase.
iii) Learn how we credit photos in our Schmap Guides.
iv) Browse online or download the fifth edition of our Schmap San Francisco Guide.

While we offer no payment for publication, many photographers are pleased to submit their photos, as Schmap Guides give their work recognition and wide exposure, and are free of charge to readers. Photos are published at a maximum width of 150 pixels, are clearly attributed, and link to high-resolution originals at Flickr.

Our submission deadline is Tuesday, February 24. If you happen to be reading this message after this date, please still click on the link above (our Schmap Guides are updated frequently - photos submitted after this deadline will be considered for later releases).

Best regards,

Emma Williams,
Managing Editor, Schmap Guides
www.schmap.me/emma.williams

***************************************************************************

From: Emma J. Williams
Subject: Schmap San Francisco Sixth Edition: Photo Inclusion


Hi Kirk,

I am delighted to let you know that your submitted photo has been selected for inclusion in the newly released sixth edition of our Schmap San Francisco Guide:

Half Moon Bay Art & Pumpkin Festival
www.schmap.com/sanfrancisco/events_outandabout/p=20581/i=20581_4.jpg

If you use an iPhone or iPod touch, then this same link will take you directly to your photo in the iPhone version of our guide. On a desktop computer, you can still see exactly how your photo is displayed and credited in the iPhone version of our guide at:

Half Moon Bay Art & Pumpkin Festival
www.schmap.com/?m=iphone#uid=sanfrancisco&sid=events_outandabout&p=20581&i=20581_4

Finally, if you have a blog, you might also like to check out the customizable widgetized version of our Schmap San Francisco Guide, complete with your published photo:

www.schmap.com/guidewidgets/p=66304943N00/c=SJ20012191

Thanks so much for letting us include your photo - please enjoy the guide!

Best regards,

Emma Williams,
Managing Editor, Schmap Guides
www.schmap.me/emma.williams


Thursday, March 5, 2009

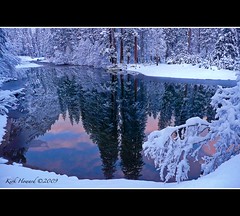
Reflection at Dawn


Reflection at Dawn
Originally uploaded by Kirk Howard

An early February snowy morning in Yosemite National Park. This is a photo from Stoneman Bridge take with my Panasonic Point n Shoot.

What attracted me to this image is the glassy calm of the Merced River and the dawn colors in the reflection.

Wednesday, March 4, 2009

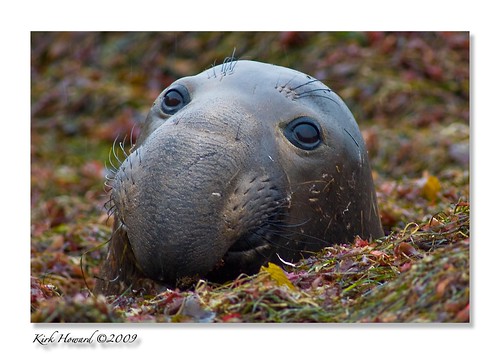
Snuffleupagus


Snuffleupagus, originally uploaded by Kirk Howard.

Young Male Elephant Seal at Ano Nuevo State Natural Reserve. He was tucked into a nice cozy bed of sea grass that washed up on the shore during high tide.

Friday, February 27, 2009

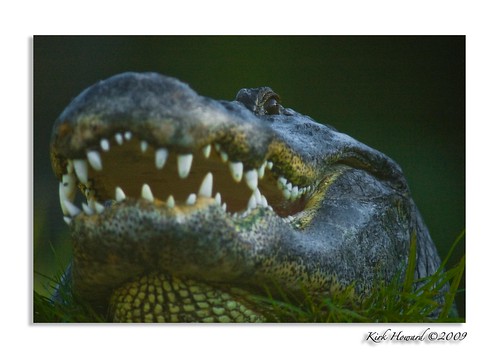
Al E. Gator


Al E. Gator, originally uploaded by Kirk Howard.

If you are looking for a great place to work on your photography technique or just take some fun great pictures, then take a day trip to your local Zoo.

My wife and I have been to our local Zoo a few times this year. We became members of the zoo in January. This allows us to get to the Zoo as often as we like for free. This week I have been to our local Zoo three times.

Our local Zoo is the Oakland Zoo. However, there are several local zoos’ to choose from in the Bay Area, but the Oakland Zoo is just a few miles from our house.

The Oakland Zoo is located East of I-580 in the Oakland Hills. It is a small Zoo with a lot to offer. It is small enough to tour the entire Zoo within a few hours, but large enough for you to see large predators and large game animals up close.

Some of the main attractions are the crowed pleasers like the Elephants, Lions, Tigers and Giraffes. Last year (2007) the Giraffe family had a new addition. However by the time we got off our butts to see the little guy, he wasn’t so little anymore.

Contemplation

Some of our favorite attractions are the Fox Faced Bats. My wife thinks they are the most interesting of all the exhibits. I like the Ring Tailed Lemurs. They are a fascinating little tribe. I also like the White-handed Gibbons. The young male swings in the trees with the greatest of ease.

This year the Oakland Zoo has introduced another Sun Bear. The Zoo has also acquired two rare lemurs, blue-eyed black lemurs. I haven’t seen them yet. According to the Zoo News it may be some time until they will be fully integrated with the Ring Tailed Lemurs.

What Cracker?

The Oakland Zoo also offers a great place to take the kiddos and let them run-a-muck in the new children’s Zoo. No it’s a Zoo with children it… The children’s Zoo has kid friendly animas for them to interact with i.e. the Alligators. They’re kind of kid friendly. They’re cuddly in their own way… The Zoo does have a new petting Zoo, and other exhibits that appeal to the pint size patrons.

Go out and enjoy you local Zoo. Have fun and relax, just make sure you take your “Big Glass”. I have shot most of my images with my Nikon Nikkor 300mm f/4.0 with a 1.4x extender. It lets me get up close and personal with the big cats, without becoming part of the food chain.

Big Smile

Tuesday, February 24, 2009

Lift Off...


Rebound, originally uploaded by Kirk Howard.


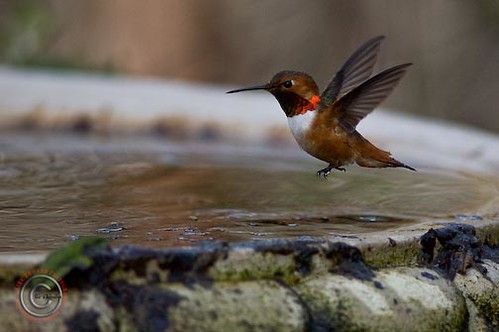
On the Strobist blog I read an article last week about how a reader uses several off camera speed lights to photograph the high speed movement of hummingbirds. In this process of using the off camera lighting he freezes the motion to almost eliminate the blur.

Now consider this a hummingbird will beat his wings from 15 to 200 per second. So you need a high shutter spend and High-speed sync with a strobe to stop the action.

Read more about it here at Strobist Blog., also link over to Pat Hunts Flickr Page and check out more of his work.

The post I read at Strobist blog and Pat’s work is what inspired my photo above of the Rufous Hummingbird, pulling up his landing gear just after take-off. Notice the ripples in the water from the downward air pressure of the wings beating.

I took this at the Coyote Hills Regional Park Nectar Garden. It was the only place I could think of that had a regular visitation of hummingbirds. I went back two days in a row to get this image. As Ms. Brezden used to say “Patience is a virtue in which great things happen”. I know she is did coin it, but man she used to tell me that everyday.

My image was taken with ambient light. I pumped up my ISO to 800 used my 300mm prime lens set wide open at f/4 and shutter speed at 1/2500 of a second. I set my camera on my tripod, and just waited for my quarry to come to me.

In the garden they have three water fountains, bird baths that the hummingbirds like to drink at. The walkway converges right in the middle of these fountains. All I had to do is wait. It wasn’t long and I could hear the familiar, but distinctive click or chirp that they make. I would hear them buzz around behind me. As they would get close to the birdbath I would slowly put my eye to the view finder and slightly adjust the camera to where they might be next.

Hummingbirds can be very skittish. Plus they have a great need not to stay in one place for more then they have too.

Friday, February 20, 2009

Action!...

Forest Feline


My life through actions. Actually it’s my life through Photoshop CS3 Actions. Earlier this week while I was furiously trying to catch up on all the photography blogs I follow, I found a tutorial by wildlife photographer Moose Peterson.

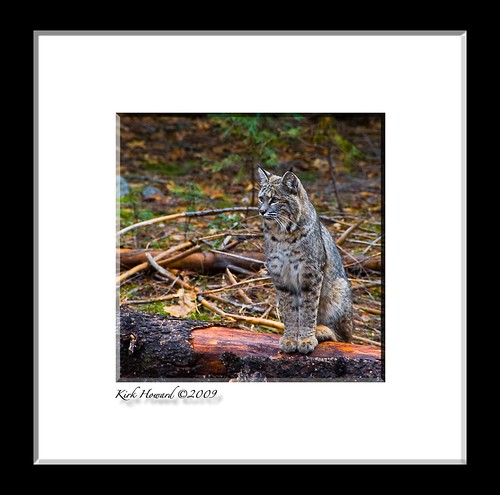
The tutorial is how to create a poster action in Photoshop for a web page. The first few times I tried creating the action I had a few hiccups. Then when I got the hang of creating an action, I felt more confident to create and work on my own. I took his action and put my own spin on it.

It really is a process of trial and error. Unfortunately I discovered you really have to double check your work. Once the action is created and you find a mistake… It is a pain in the arse to correct one line-action. I find that it is better to scrap the whole action and start over. I have managed to shorten a few steps because I have had to redo a few more than once.

If you don’t know how to use or create actions, take the time and learn. Once they are created, you spend less time in Photoshop and more time creating more productive stuff.

Above and below are examples of the poster and picture frame actions I created in the past few days. If you have any question about actions or how I created mine drop me a note and I will do my best to explain what I learned.

Golden FlyerSTALKER

Monday, February 2, 2009

Lomo Macaw - Featured in Diablo Magazine


Lomo Macaw, originally uploaded by Kirk Howard.

Diablo Magazine in their infinite wisdom has selected this photo for the Feb. 2, 2009 "Photo of the Day".
______________________________________________________

In the September 2008 issue of Popular Photography, Digital Toolbox there was an article “Cheap Shots” that described how to recreate Lomography.

Lomography started about 17 years ago in Austrian photographers got their hands on some cheap Russian made plastic cameras called Lomo LC-A. This came gave them extra contrast, saturation and big vignette. Lomography has expanded from these cheap little cameras.

This is my version of the Photoshop remake of the Lomography PS tutorial.

Friday, November 28, 2008

BLACK FRIDAY…

I dreaded the holiday shopping season as a retail employee. In celebration of “Black Friday”, and that I haven’t worked retail for over 150 full moons, here are some shopping ideas for the photographer in your life.

1. Books are always a good idea. How to’s: for better technique. Amazon.com com has a great selection of photography books. Some great authors are Scott Kelby, Joe McNally, and Annie Leibovitz. Also, some other books are the Photo Workshop series.

2. Magazines are another gift that keeps giving for at least 12 months. There are a plethora of Photography or Photoshop magazines. Most of these can be purchased or ordered from the websites directly. Popular Photography (PopPhoto) is a great general magazine.


More specific are magazines like Photoshop User or Layers magazines. National Association of Photoshop Professionals (NAPP) puts out these magazines. NAPP also has a membership that will not only get all the Photoshop User issues for the year you also get discounts to buy gear and on-line tools and training.

2. Glass Blow Ornaments are always a good stocking stuffer. Here are some VINTAGE CAMERA ORNAMENTS.


Another great gift resource comes from the guys at NAPP and Layers Magazine. It’s the Gonzo Holiday Gear Guide. You will have to navigate to different pages to see the entire gift guild, but it worth the looks. This is the 2007 Gonzo Holiday Gear Guide. The 2008 Gonzo Holiday Gear Guide version has been released, but you will need to purchase the Layers magazine to see this years toys. Stay tuned for an update.

Now if you haven’t noticed already, everything I posted can be had over the internet. I try to do most of my shopping this way. I hate having to deal with holiday shoppers and the nastiness it brings out in the average Joe.

If you know what you are looking for and have a good idea what retail is for items, you can score some good deals on-line. Warning, be smart and wise and make sure the product and company is reputable.

That’s if for me. I will be braving the crowds at the Apple Store today. Apple usually has a one day sale on “Black Friday”. Apple is notorious for never selling anything under MSRP, except for “Black Friday”.


Good Luck and may the shopping be with you…

Friday, October 24, 2008

Lets Bokeh...

In the world of Depth of Field lives the little town of Bokeh… No just kidding. The term bokeh used in photography comes from the Japanese word boke a noun form of bokeru.

Bokeh - is a photographic term referring to the appearance of out-of-focus areas in an image produced by a camera lens using a shallow depth of field. Different lens bokeh produces different aesthetic qualities in out-of-focus backgrounds, which are often used to reduce distractions and emphasize the primary subject.

I use a couple different lenses to achieve Bokeh. The lens that works the best is the Nikon Nikkor 50mm f/1.8. The 50mm lens allows me to have the greatest versatility with a great range of aperture range. Te other two lenses are the Nikon 18-200mm f/3.5-5.6 and my 80-200mm f/2.8. All these lenses achieve a great depth of field and much defined bokeh. But the best is still my inexpensive 50mm f1.8.

Another way I create bokeh is artificially in CS3. Sometime if I want to have a subject pop out of the background or my depth of field isn’t shallow for the effect I create the same effect using lens blur or Gaussian blur in layers.
Here are three examples.
Shot with shallow depth of field f/6.3.

The same image with an artificial lens blur layered over the image.

This is also the same image with layer mask, to allow the center of the picture to be clear.
To be Continued...

Tuesday, October 21, 2008

Galapagos Diving...

I found this on Vimeo. I thought it was awesome. It's seven minuets long but worth watching. Kirk Out

Galapagos from Darek Sepiolo on Vimeo.

Tuesday, March 11, 2008

Silky...

I took this shot on our hike back from Mirror Lake in Yosemite. The time of day was after 4:00 PM. The sun had moved in the Valley and the river was in the shadow of Half Dome. This created a low setting allowing me to set my shutter to a slower speed. It was also dark enough I could leave the aperture open to get a better depth of field adjustment.

The key to making the water look silky is to work with a slow shutter speed. In some of these shots I had the shutter open for as long as 8 seconds. Two crucial pieces of equipment will be needed for these long exposure shots. One is a tripod so the camera will remain stable and stable. Two, you will need a cable release or remote release. The will eliminate and unwanted movement on the camera during exposure.

The best time is to shoot these types of images either early in the morning or later at night. Another good way is to take the image during overcast or cloudy days. Remember the key is to slow the shutter speed. If it is too bright or sunny sometimes you can trick the camera by closing the aperture. Keep in mind that the smaller the aperture opening the greater the depth of field (focal length).

This is the same shot. I cropped the image tighter. I straightened the image so the sight line would be level. In Photoshop CS3 I made the image warmer (not as blue or cold). I also did a little post sharpening.

Tuesday, February 19, 2008

gi•nor•mous…

ginormous - gi·nor·mous Pronunciation: \jī-ˈnȯr-məs\ Function: adjective, Etymology: gigantic + enormous, Date circa 1948 : extremely large : humongous


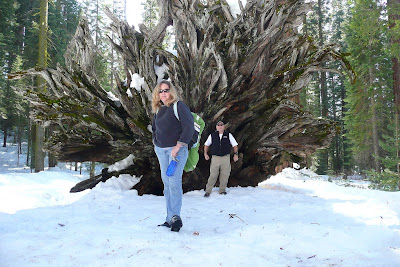
I have to say this describes the trees in Yosemite’s Mariposa Grove exactly. Over the long weekend my wife and I went back to Yosemite National Park. Mariposa Grove is one of 75 groves of the Giant Sequoia Trees. We hiked six miles in the snow, up hill both ways to the Giant Sequoias in Mariposa Grove, and to see the Grizzly Giant. The Grizzly Giant is the largest Sequoia in the Mariposa Grove. It is estimated to be over 3000 years old. According to the literature, the lower limbs of the Grizzly Giant are larger in girth than any other non-sequoia tree trunk in the Mariposa Grove. Ginormous...

We also went back to the valley floor. We had scheduled a walking photo tour early Saturday morning. The tour was hosted by a photography pro at the Ansel Adams Studio Gallery in the Yosemite Village.

The tour took about 2 hours. It is designed for all levels of photography. The guild showed us techniques of framing and depth of field etc... He also took the group to some of the places Ansel Adams took some of his famous pictures.

There were about twenty-five of us in the group, and the only person shooting on film was the guild. Some of his instruction was about film and darkroom processing. I noticed that 90% of the people on the tour had a strange blank look when he spoke about the use of film.
This is my take on film vs. digital photography:

Film – Film photographers are like snipers. One shot one kill. Film users require more technique and a higher level of skill to master. Since you have a limited amount of pictures per roll of film, you have to make sure your shot is almost perfect. Paying close attention to lighting, focus, exposure, framing, detail, depth of field, blah, blah, blah… You will never know what you really have until your film is processed, and in a roll of 36 Fuji Provia slide film, you might get one, one good kill. Film photography doesn’t make you lazy.

Digital – Digital photographers’ are like an infantry soldier. The grunt grabs his M16A4 riffle and sprays lead until he has to reload or gets tired. Just like the grunt a new digital photographer can shoot pictures until his digital media storage becomes full or he gets bored and or tired.

Even though most skilled photographers that switched to digital still use proper technique and discipline, for the most part we can get lazy. If we don’t like the picture the first time (delete) and shoot it until you get it right. We can shoot until the cows come home, and in a thousand images we will be happy if we get ten decent images.

Thursday, January 3, 2008

Daffodil…

I took this picture of a white daffodil on New Years morning in the parking area of the Battery Mendell. I went to take shots of the Golden Gate Bridge. But “Magic Hour” only lasts a few minutes and then you move on to something else that will respond better in the increasing morning light.

I was told long ago that when you take picture of flowers never (if possible) take the picture of a flower straight down. It makes the flower look flat and ordinary. I shot this image not with my Nikon D70s, instead I had my Panasonic TZ3 in hand.

It was almost on my belly to capture an upward angle. I was trying to do two things: One get a bug’s eye view and two try to eliminate the Marin hills in the background from the frame.

I cropped this image, changed the aspect from landscape to portrait. I made some minor adjustment to contrast, brightness and saturation. I used Microsoft Office Picture Manager. It’s not very good photo editing not like CS3, but it’s all I have at work.

Here is a good on-line resource I use for photography tips in a pinch. Digital Photography School has a great article on Photographing Flowers


How to Take Pictures of Flowers
These simple hints will help you move the quality of your flower photos from good to great.

1. Get very close to the subject
Flowers can have stunning appeal from a distance by adding splashes of color to a scene, or lending a particular mood, but for truly dramatic flower photos getting in close is the best. This will enable you to draw attention to the intricate and fascinating details every flower has to offer.

Consider using your macro mode to get as close as physically possible or your portrait mode to zoom in and manage perspective distortion. Also, letting your flower spill over the frame of your photo will lend a larger-than-life appeal.

2. Clear the clutter
The best flower photos usually zero in on a single flower or small group of flowers making them very similar to portraits. So, just as you would for a portrait, concentrate on eliminating clutter from your view.

Accomplish this by using depth of field to blur background areas, by shifting your viewpoint to simplify the background, for example by making the background the sky rather than a field of other flowers, and by using shadows to obscure background areas.

3. Get the right light
Soft morning and evening light work best by enabling you to capture the delicate textures of petals and stamina. Backlighting works well to provide a broader range of colors, both solid and translucent, as well as to highlight the fragility and transience of each blossom.

Likewise, a deliberate use of shadows can enhance the mood and further concentrate attention on areas of high detail. Light diffusion panels widely available in camera stores can come in handy for many flower shoots as the best light can be fleeting and good shots can take time to compose.

4. Look for ways to complement colors
Look for ways to combine colors that complement each other, such as catching yellow and orange flowers against a deep blue sky, or red roses against a background of white clouds.

5. Arrange your own setting
While thoughts often settle on the outdoors and natural settings when flower photography comes up, some of the most stunning floral photos are those arranged down to the last detail in a studio-like setting. Think of flower heads floating in a silver bowl on a white-linen, candle-lit table and you'll be on your way.

Thursday, November 15, 2007

Monarch…

Photo by: Kirk Howard Copyright© 2007
The butterfly species Danaus plexippus is commonly known as the Monarch butterfly. The western population of the Monarch butterfly overwinters in various sites in central coastal California, United States, notably in Pacific Grove and Santa Cruz. In San Leandro they have set up tours to view the Monarch butterfly.

In San Simeon I took a few images of the Monarch butterfly while I was waiting at the entrance of the Hearst Castle visitors’ center. The butterflies really like this yellow daisy looking flower.

The images I took were not the greatest. I was hurried and didn’t have the proper equipment. Typically I would have a tripod, cable release and my macro lens to capture the best “Tack Sharp” images I could. However, I had to work with the tools I had at hand. I had my 80~200 mm f2.8 Zoom attached. I had the ISO set to 400 with a circular polarizer attached to the lens.

The zoom lens was perfect for this type of image. It allowed me to shoot closer to the subject without physically being close to the subject and disturbing the butterfly. The focal length and the large aperture allowed me to create a very shallow (DOF) depth of field. This allows the subject to stay in focus and the distracting background to be slightly out of focus.

A macro zoom lens would bring out more detail.

Wednesday, October 31, 2007

Happy Halloween…

Halloween is upon us, and the Great Pumpkin will rise from the pumpkin patch and shower all the gools, goblins, witches and vampires with candy riches.


Photo by: Kirk Howard Copyright© 2007

While at Arata pumpkin patch in Half Moon Bay with my newest nephew and his mom and dad, I snapped this image of a few gourds just laying around in the afternoon sunlight.
Photo by: Kirk Howard Copyright© 2007

Samhainophobia is a fear of Halloween
Happy Halloween


THE CLICK... BLOG HAS MOVED!

You will be automatically redirected in a few seconds. If not, visit
The Pixel Hoarder
and update your bookmarks.