(VALs) can go a long way. a great video from the BYU shooting team shows some great lighting techniques and VALing with a monoblok Video
Showing posts with label Techniques. Show all posts
Showing posts with label Techniques. Show all posts
Saturday, October 10, 2009
VAL's Voice Activated Lights
Tuesday, October 6, 2009
Astrophotography
If you are fascinated in Astrophotography and how they do it, wired.com has a great article of how Rogelio Bernal Andreo does his Astrophotography. He walks you a quick tutorial of how it's done and the equipment that he uses to make his fantastic images of the stars. Here is the link to Wired.com article "The Making of a Mind-Blowing Space Photo".
My attempts have never show the results that Andreo has produced. The closest celestial body to earth is the only thing I can get a good image from in space.

Monday, October 5, 2009
Talking to Strangers
Zack Arias an Atlanta based photographer was in New York City last September. While in NYC he took some time out from his busy shooting schedule and gave himself a little shooting assignment. He decided to take 10 portraits of 10 strangers in 10 hours. He found that most people can be receptive while others are scared of his glass.
Take a look at his work and how he approached his subjects. He includes a video so you can see as he put it "His Dork like approach". Here is the link to his Blog post: Street Portraits :: NYC 09/2009 :: Video + Stills
Thursday, October 1, 2009
Ronald W. Reagan Presidential Library
Magellan and I finally made it home from our trip to Southern California. Our journey home took to the Ronald W. Reagan Presidential Library. Our main reason for going was that Magellan is taking a summer class from UCSD that will give her one credit and move her up on the pay scale at work in October. The secondary reason is we wanted to see the Air Force One, tail number 27000.
It was amazing to see this huge Boeing 707 perched three stories above your head. This massive piece of machinery was literally standing on three pillars.


If you find yourself in Simi Valley, California and on Hwy 118. Take some time and visit the Ronald W. Reagan Presidential Library, no matter what political party you belong, you will find the history amazing, and the history of his career for the early days of radio and movies through his political career.
Tuesday, September 29, 2009
Take Car Photos While In Motion

Here is a quick post for the car enthusiast and photographer in you. In one of the posts from a favorite blog I follow DIYPhotography.net. James Evins shows us how he makes a Do-it-yourself camera rig. I have looked into getting a camera rig for several projects that I want to do. This seems to be a cheap alternative to a more expensive Rig Kit.
Follow along with his detail DIY project. I would like to get feed back with anyone who actually makes a rig for themselves.


Ref: http://www.diyphotography.net/take-cool-car-photos-with-a-diy-specialized-car-rig
Saturday, August 15, 2009
Depth of Field
D.O.F. or Depth of Field, What is it? Is it the distance from home plate to the center field fence? Is it the height of the wild grass in an unmowed meadow or field? No, it is none of these.
Depth of Field is a term used in photography to describe the focal distance between the nearest object and the farthest object in focus in the focal plane. Here is a simple example of how D.O.F. works. If you are standing on a street corner and you are looking down the street a sign. You notice that most everything is in focus between you and the sign, but the sign itself seem to be a bit out of focus. However, if you squint you notice that it bring more objects into focus including the sign.
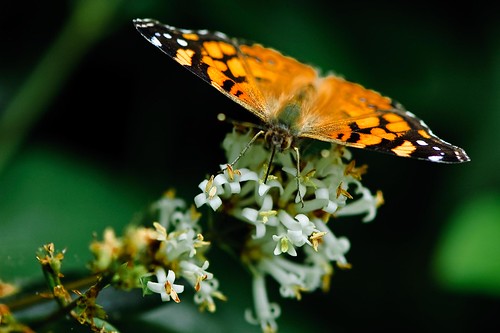
This happens because as we squint we close down the iris in our eyes. Just like a camera lens we can close down our aperture and create the same affect, increasing the focal distance. If you have a 50mm lens with the aperture adjustments of f2.8 to f22 the larger the number the smaller the aperture opening and the greater focal distance is created. The smaller the number the short the focal distance and the wider the aperture opening is.
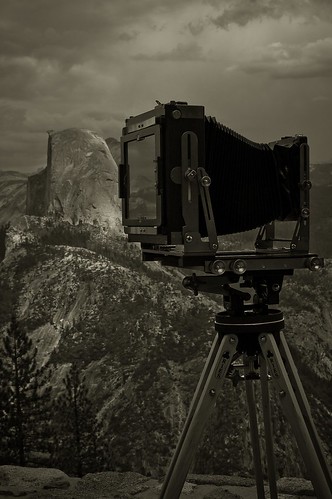
Keep in mind that the aperture does increase or decrease the amount of light allowed through the lens of the camera. So you will have to adjust the shutter speed to compensate, and make a properly exposed image.
If you have a point-n-shoot camera without all these adjustments, don’t fear. It is possible to achieve the same results even when you are using a point-n-shoot style digital camera. On the top or back of the camera is a dial. On that dial are many different settings represented usually with little pictures.
The mountain picture is used for taking scenic pictures. This is the setting you should use for the greater depth of field. When this setting is selected the camera knows you need the greatest focal range and will select the proper aperture and shutter speed.
For a shallower depth of field choose the picture of the flower. This is for close up photography. This setting will allow you to take a sharp picture of a subject and allow the background to be out of focus.
Give this a try, let me know how it works out for you…
Tuesday, July 28, 2009
Green Sea Turtle
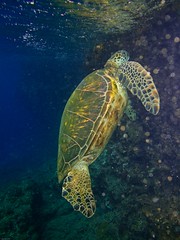
Green Sea Turtle
Originally uploaded by Kirk Howard
This was taken with my new Canon PowerShot G10 camera and Canon WP-DC28 underwater housing. It took a week to get somewhat familar with all the controls and buttons and knobs.
However by the end of my vacation I was able to capture moments like this free diving with an very buoyant housing. I need to get the weights to help make the camera neutrally buoyant.
Wednesday, May 13, 2009
Yosemite Night and Day
Sunday I drove to Yosemite just for the night. Just like last year in June I went to capture a Lunar Rainbow or Moonbow. This time I went in May on the night after the full moon. The difference from the two months June and May, May has a lot more water coming out of the waterfalls. Here is a link to last years post on Lunar Rainbows or Moonbows June 2008.
Here is a Shot that I took from the pathway in Cooks Meadow parallel to the Merced River. It was almost 2:00 AM and the Moonbow was starting to disappear.
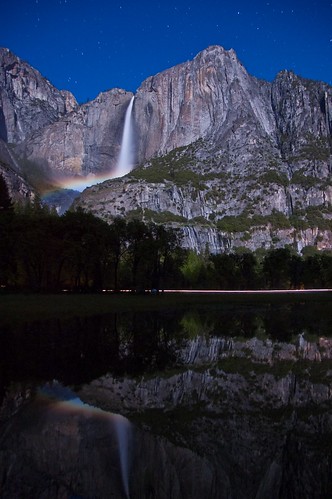
This video was shot on the same day May 11, 2009. It is a 360º view from the highest point on Sentinel Dome.
Sentinel Dome 360º from KiHo on Vimeo.
Sentinel Dome 360º May 11, 2009
Wednesday, March 4, 2009
Snuffleupagus
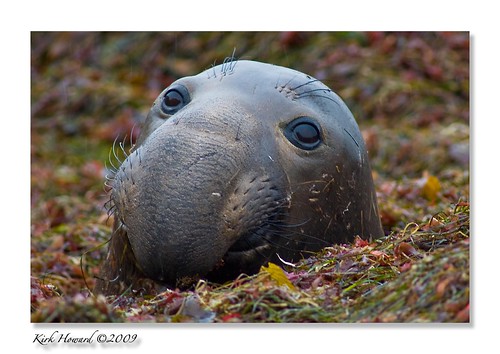
Snuffleupagus, originally uploaded by Kirk Howard.
Young Male Elephant Seal at Ano Nuevo State Natural Reserve. He was tucked into a nice cozy bed of sea grass that washed up on the shore during high tide.
Tuesday, February 24, 2009
Lift Off...
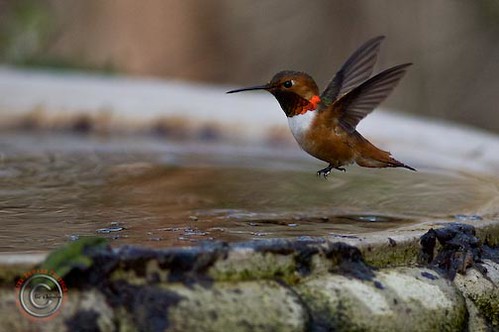
On the Strobist blog I read an article last week about how a reader uses several off camera speed lights to photograph the high speed movement of hummingbirds. In this process of using the off camera lighting he freezes the motion to almost eliminate the blur.
Now consider this a hummingbird will beat his wings from 15 to 200 per second. So you need a high shutter spend and High-speed sync with a strobe to stop the action.
Read more about it here at Strobist Blog., also link over to Pat Hunts Flickr Page and check out more of his work.
The post I read at Strobist blog and Pat’s work is what inspired my photo above of the Rufous Hummingbird, pulling up his landing gear just after take-off. Notice the ripples in the water from the downward air pressure of the wings beating.
I took this at the Coyote Hills Regional Park Nectar Garden. It was the only place I could think of that had a regular visitation of hummingbirds. I went back two days in a row to get this image. As Ms. Brezden used to say “Patience is a virtue in which great things happen”. I know she is did coin it, but man she used to tell me that everyday.
My image was taken with ambient light. I pumped up my ISO to 800 used my 300mm prime lens set wide open at f/4 and shutter speed at 1/2500 of a second. I set my camera on my tripod, and just waited for my quarry to come to me.
In the garden they have three water fountains, bird baths that the hummingbirds like to drink at. The walkway converges right in the middle of these fountains. All I had to do is wait. It wasn’t long and I could hear the familiar, but distinctive click or chirp that they make. I would hear them buzz around behind me. As they would get close to the birdbath I would slowly put my eye to the view finder and slightly adjust the camera to where they might be next.
Hummingbirds can be very skittish. Plus they have a great need not to stay in one place for more then they have too.
Friday, February 20, 2009
Action!...
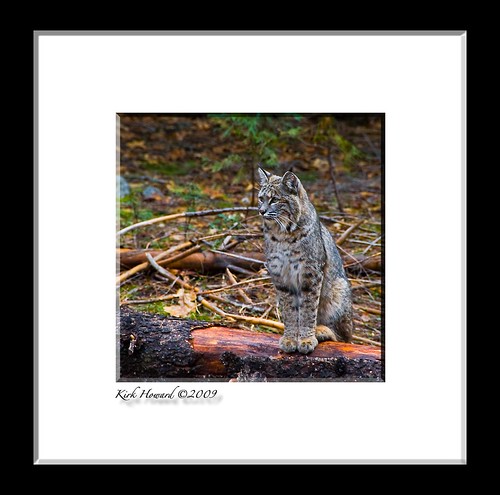
My life through actions. Actually it’s my life through Photoshop CS3 Actions. Earlier this week while I was furiously trying to catch up on all the photography blogs I follow, I found a tutorial by wildlife photographer Moose Peterson.
The tutorial is how to create a poster action in Photoshop for a web page. The first few times I tried creating the action I had a few hiccups. Then when I got the hang of creating an action, I felt more confident to create and work on my own. I took his action and put my own spin on it.
It really is a process of trial and error. Unfortunately I discovered you really have to double check your work. Once the action is created and you find a mistake… It is a pain in the arse to correct one line-action. I find that it is better to scrap the whole action and start over. I have managed to shorten a few steps because I have had to redo a few more than once.
If you don’t know how to use or create actions, take the time and learn. Once they are created, you spend less time in Photoshop and more time creating more productive stuff.
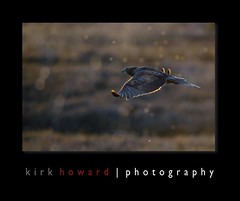
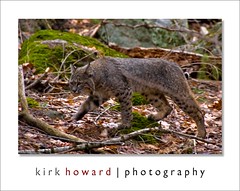
Above and below are examples of the poster and picture frame actions I created in the past few days. If you have any question about actions or how I created mine drop me a note and I will do my best to explain what I learned.
Monday, February 2, 2009
Lomo Macaw - Featured in Diablo Magazine
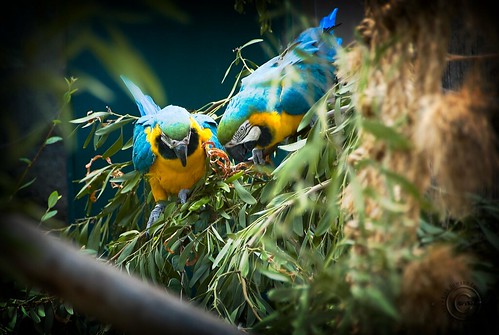
Diablo Magazine in their infinite wisdom has selected this photo for the Feb. 2, 2009 "Photo of the Day".
______________________________________________________
In the September 2008 issue of Popular Photography, Digital Toolbox there was an article “Cheap Shots” that described how to recreate Lomography.
Lomography started about 17 years ago in Austrian photographers got their hands on some cheap Russian made plastic cameras called Lomo LC-A. This came gave them extra contrast, saturation and big vignette. Lomography has expanded from these cheap little cameras.
This is my version of the Photoshop remake of the Lomography PS tutorial.
Monday, January 12, 2009
JPG has been revived...

For all those who were not aware. JPG magazine or (8020 Media) had sent out a blast email at the end of the year stating that the Magazine and Online site no-longer had the capital to continue doing business.
They explained how they had exhausted all possibilities of finding backers. So on January 5th, 2009 they were officially done.
However today I received an email stating that with the help and support of the readers and on-line friends they may have struck and deal for continued life of the magazine and website.
I enclose the actual letter for your review.
REF:
A Future for JPG
1 message
________________________________________
8020 MediaMon, Jan 12, 2009 at 12:40 AM
To: Kirk Howard
We couldn't ask for a better community. In the week or so since our last email, the outpour of support has exceeded our wildest expectations. Your efforts, such as starting savejpg.com, writing blog posts, commenting on Twitter and Flickr, and generally making your voices heard, have provided exciting new opportunities for us.
We're thrilled to say that because of you, we have multiple credible buyers interested in giving JPG a home. We will be keeping the site up after all, and hope to have a final update in the next week or so on who the acquirer will be. Thank you for making all of this possible.
Laura Brunow Miner
Editor in Chief
They explained how they had exhausted all possibilities of finding backers. So on January 5th, 2009 they were officially done.
However today I received an email stating that with the help and support of the readers and on-line friends they may have struck and deal for continued life of the magazine and website.
I enclose the actual letter for your review.
REF:
A Future for JPG
1 message
________________________________________
8020 Media
To: Kirk Howard
We couldn't ask for a better community. In the week or so since our last email, the outpour of support has exceeded our wildest expectations. Your efforts, such as starting savejpg.com, writing blog posts, commenting on Twitter and Flickr, and generally making your voices heard, have provided exciting new opportunities for us.
We're thrilled to say that because of you, we have multiple credible buyers interested in giving JPG a home. We will be keeping the site up after all, and hope to have a final update in the next week or so on who the acquirer will be. Thank you for making all of this possible.
Laura Brunow Miner
Editor in Chief
Thursday, December 25, 2008

Tuesday, December 23, 2008
Blue Stars Bokeh...

My fist attempt of using a cut out to create bokeh. I think I only needed one star in the center, not the five or six I used. I will get better as time goes on... Blue Christmas light were the target of this image.
Bokeh is an adaptation from a a Japanese word meaning blur. In photography this term is used to describe the quality of the areas in the picture which are not in focus.When referring to Bokeh, we can distinguish some of it characteristics:
- Is the light/dark gradient smooth or sharp?
- What shape will a small dot of light take what it is in the Bokeh area? (mirror lenses for example, create a bagel like Bokeh)
We can play with those two variants to create a special Bokeh. Click... here.
Friday, November 28, 2008
BLACK FRIDAY…
 I dreaded the holiday shopping season as a retail employee. In celebration of “Black Friday”, and that I haven’t worked retail for over 150 full moons, here are some shopping ideas for the photographer in your life.
1. Books are always a good idea. How to’s: for better technique. Amazon.com com has a great selection of photography books. Some great authors are Scott Kelby, Joe McNally, and Annie Leibovitz. Also, some other books are the Photo Workshop series.
2. Magazines are another gift that keeps giving for at least 12 months. There are a plethora of Photography or Photoshop magazines. Most of these can be purchased or ordered from the websites directly. Popular Photography (PopPhoto) is a great general magazine.


More specific are magazines like Photoshop User or Layers magazines. National Association of Photoshop Professionals (NAPP) puts out these magazines. NAPP also has a membership that will not only get all the Photoshop User issues for the year you also get discounts to buy gear and on-line tools and training.
 2. Glass Blow Ornaments are always a good stocking stuffer. Here are some VINTAGE CAMERA ORNAMENTS.
 2. Glass Blow Ornaments are always a good stocking stuffer. Here are some VINTAGE CAMERA ORNAMENTS.
 Another great gift resource comes from the guys at NAPP and Layers Magazine. It’s the Gonzo Holiday Gear Guide. You will have to navigate to different pages to see the entire gift guild, but it worth the looks. This is the 2007 Gonzo Holiday Gear Guide. The 2008 Gonzo Holiday Gear Guide version has been released, but you will need to purchase the Layers magazine to see this years toys. Stay tuned for an update.
Now if you haven’t noticed already, everything I posted can be had over the internet. I try to do most of my shopping this way. I hate having to deal with holiday shoppers and the nastiness it brings out in the average Joe.
 If you know what you are looking for and have a good idea what retail is for items, you can score some good deals on-line. Warning, be smart and wise and make sure the product and company is reputable.
That’s if for me. I will be braving the crowds at the Apple Store today. Apple usually has a one day sale on “Black Friday”. Apple is notorious for never selling anything under MSRP, except for “Black Friday”.
Good Luck and may the shopping be with you…
Tuesday, November 18, 2008
24 Beams of Light...
 This was my first year to Pigeon Point Light Station to watch and photograph the light of the old first order Fresnel lens. It was a fantastic opportunity to capture the beams of light emanate from the 24 prism panels in the lens.
They light was lit at 6pm and for the first five minutes they held the carriage still to keep the lens from rotating. Giving an untold amount of photographers the opportunity to capture 24 beams of light. After the first five minutes the lens rotates beaming a signature flash of light every ten seconds.
The closer you stood the lighthouse structure the more the beams were pronounced. It was amazing to see the beams of light streak past on the distant hillsides and in the ocean.
In the lantern room the bull’s-eye lens is 100' above ground to the focal plane of the lens. Also 150' (about) above sea level to the focal plane of the lens. This height compensates for the curvature of the earth. On a clear night, light has a visual distance of 24 miles from the ocean.
 It was announced on Saturday that this might be the last lighting of the Pigeon Point Lighthouse Lantern. With further investigation it may be discontinued until the necessary renovations are completed to fix the damaged lighthouse structure.
The reason why they may not light the lamp in 2009 is a safety issue and not a cost issue. The Coast Guard engineering studies report the structure may collapse if an earthquake or a very strong wind storm were to batter the lighthouse.
Over the years the sea spray and salt air have slowly decayed the exterior structure. In 2001 part of the west facing caprice fell (cornice on the exterior of the lighthouse fell off). The result was the closure of the Lighthouse Structure to the public.
According to Staff and California State Parks, lack the funding needed it to fix the lighthouse and lantern room. Current estimated figures are around 5 million dollars to repair and renovate the structure and rework the lens. Most of the funds required, have to be provided by private funding.
 Donations can be made to restore the Pigeon Point Light Station or to Cal. State Parks Foundation.
Wednesday, November 5, 2008
Hologram...
No matter how you vote last night or your political affiliation you have to admit technology is advancing and here to stay.
Last night as I watched election results on many of the major TV networks FOX, ABC, CBS, NBC, CNBC and CNN, I came across something amazing. CNNs Wolf Blitzer was talking to another reporter. At first I thought the reporter looked a little short, then I realized it was a projected image. Not only a projected image, but a hologram.
Take a look at the video clip it’s really cool.
Tag line:
©opyright,
Gear,
News,
Techniques,
Video
0
STATE YOUR INSANITY PLEA HERE

Tuesday, October 28, 2008
Artificial Bokeh…
Continued from Let’s Bokeh…
This image was taken at San Diego Wild Animal Park in 2006 pre Nikon DSLR. All I was using was an inexpensive Kodak point-in-shoot. The camera took nice colorful images, but lacked manual adjustments. Unfortunately the camera didn’t allow the ability to create (DoF). The entire image appears to be on the same focal plane. I adjusted colors and contrast in Adobe Lightroom 1.41.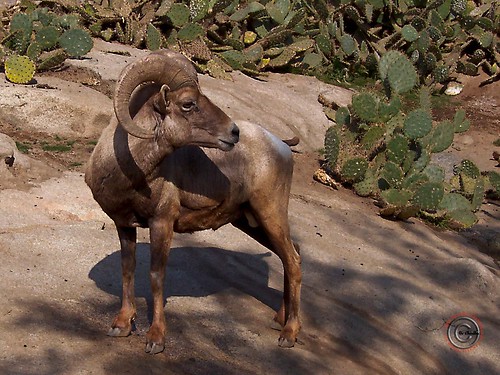
This next image I adjusted in Adobe Lightroom 1.41 and Photoshop CS3. I created a Layers Mask and added Lens Blur. I didn’t think that the adjustment I made was blurry enough so I did it again.
Since I am using an adjustment mask in Layers I switched to the brush tool. Selected a soft edge brush. I made sure my primary color was black and painted over the entire sheep. The black allows the Mask to be removed in top layer to reveal the bottom clear layer, resulting in an “in-focus” sheep. This creates an artificial Bokeh and or Depth of Field.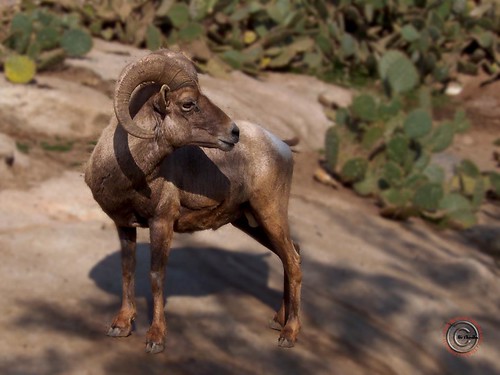
Now I fudged a little. If I really wanted to create a true DoF look, I would have made everything within the focal plane of the sheep in focus. Instead I just made the sheep in focus, I felt this made the animal stand out a little more.
This image was taken at San Diego Wild Animal Park in 2006 pre Nikon DSLR. All I was using was an inexpensive Kodak point-in-shoot. The camera took nice colorful images, but lacked manual adjustments. Unfortunately the camera didn’t allow the ability to create (DoF). The entire image appears to be on the same focal plane. I adjusted colors and contrast in Adobe Lightroom 1.41.
This next image I adjusted in Adobe Lightroom 1.41 and Photoshop CS3. I created a Layers Mask and added Lens Blur. I didn’t think that the adjustment I made was blurry enough so I did it again.
Since I am using an adjustment mask in Layers I switched to the brush tool. Selected a soft edge brush. I made sure my primary color was black and painted over the entire sheep. The black allows the Mask to be removed in top layer to reveal the bottom clear layer, resulting in an “in-focus” sheep. This creates an artificial Bokeh and or Depth of Field.
Now I fudged a little. If I really wanted to create a true DoF look, I would have made everything within the focal plane of the sheep in focus. Instead I just made the sheep in focus, I felt this made the animal stand out a little more.
Friday, October 24, 2008
Lets Bokeh...
In the world of Depth of Field lives the little town of Bokeh… No just kidding. The term bokeh used in photography comes from the Japanese word boke a noun form of bokeru.
Bokeh - is a photographic term referring to the appearance of out-of-focus areas in an image produced by a camera lens using a shallow depth of field. Different lens bokeh produces different aesthetic qualities in out-of-focus backgrounds, which are often used to reduce distractions and emphasize the primary subject.
I use a couple different lenses to achieve Bokeh. The lens that works the best is the Nikon Nikkor 50mm f/1.8. The 50mm lens allows me to have the greatest versatility with a great range of aperture range. Te other two lenses are the Nikon 18-200mm f/3.5-5.6 and my 80-200mm f/2.8. All these lenses achieve a great depth of field and much defined bokeh. But the best is still my inexpensive 50mm f1.8.
Another way I create bokeh is artificially in CS3. Sometime if I want to have a subject pop out of the background or my depth of field isn’t shallow for the effect I create the same effect using lens blur or Gaussian blur in layers.
Here are three examples.
Shot with shallow depth of field f/6.3.

The same image with an artificial lens blur layered over the image.

This is also the same image with layer mask, to allow the center of the picture to be clear.

To be Continued...
Subscribe to:
Posts (Atom)


